
Connect Onlypult to ChatGPT
Use ChatGPT Developer mode to add the Onlypult MCP server as a custom app. This works without the paid Connectors feature — you create a private app, authorize via OAuth, then invoke it in chat with @Onlypult.
MCP Server URL: https://mcp.onlypult.com/mcp
Authentication: OAuth 2.1 (sign in with your Onlypult account).
Alternative: ChatGPT Plus/Pro users can add the server via Settings → Connectors → Add custom connector. See the main MCP guide for that path.
Overview
Developer mode lets you register unverified MCP connectors as private apps. The flow:
- Enable Developer mode in ChatGPT settings
- Create a new app pointing to
https://mcp.onlypult.com/mcp - Sign in with Onlypult when prompted
- Mention
@Onlypultin any chat to use MCP tools
Prerequisites
- An active ChatGPT account
- An active Onlypult account with connected social profiles
- Developer mode available in your ChatGPT region (Settings → App Preferences)
Step 1 — Open settings
Click your profile icon in ChatGPT, then open Settings. In the left sidebar, go to App Preferences, then open the Apps tab.
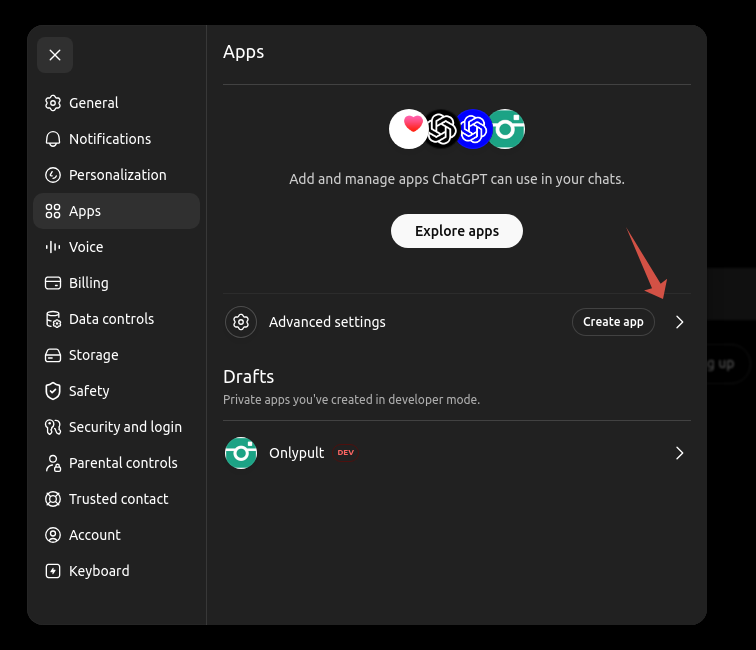
Step 2 — Enable Developer mode
Click Create app under Advanced settings (or open an existing draft). On the next screen, turn on Developer mode.
Developer mode allows unverified MCP connectors. Read the risk notice — you are adding a third-party server you trust.
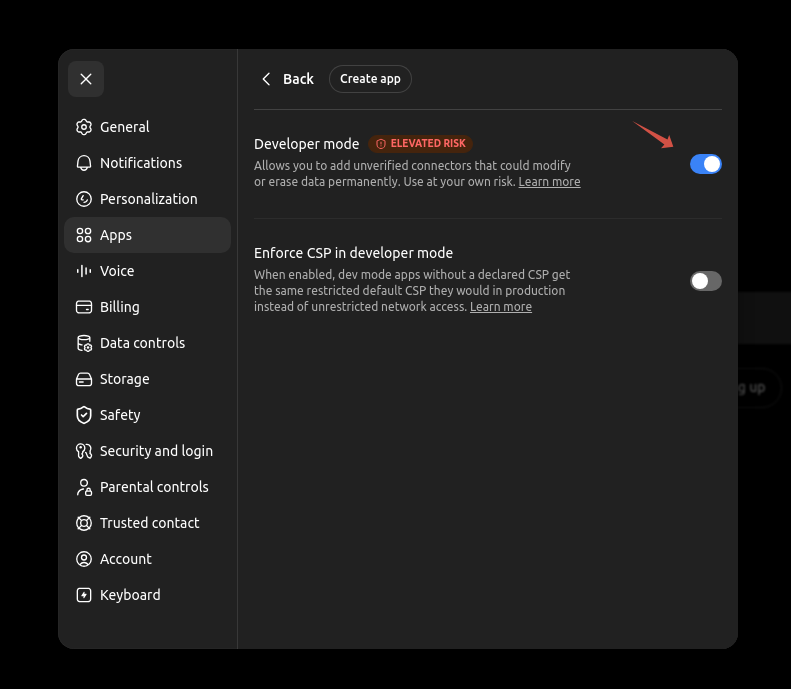
Return to the Apps tab — the Create app button is now available under Advanced settings (see Step 1).
Step 3 — Create the Onlypult app
Click Create app and fill in the form:
| Field | Value |
|---|---|
| Name | Onlypult (or any label you prefer) |
| Description | Optional, e.g. A single platform for scheduling posts |
| Connection | Server URL → https://mcp.onlypult.com/mcp |
| Authentication | OAuth |
Check the consent box acknowledging MCP server risks, then click Create.
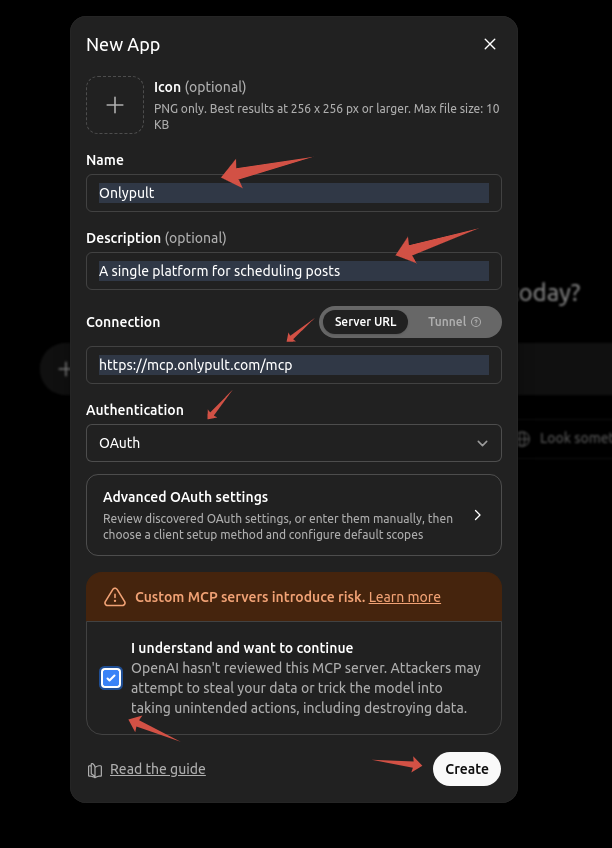
Step 4 — Connect and authorize
Open your newly created Onlypult app from the Drafts list (it shows a DEV badge). Click Connect.
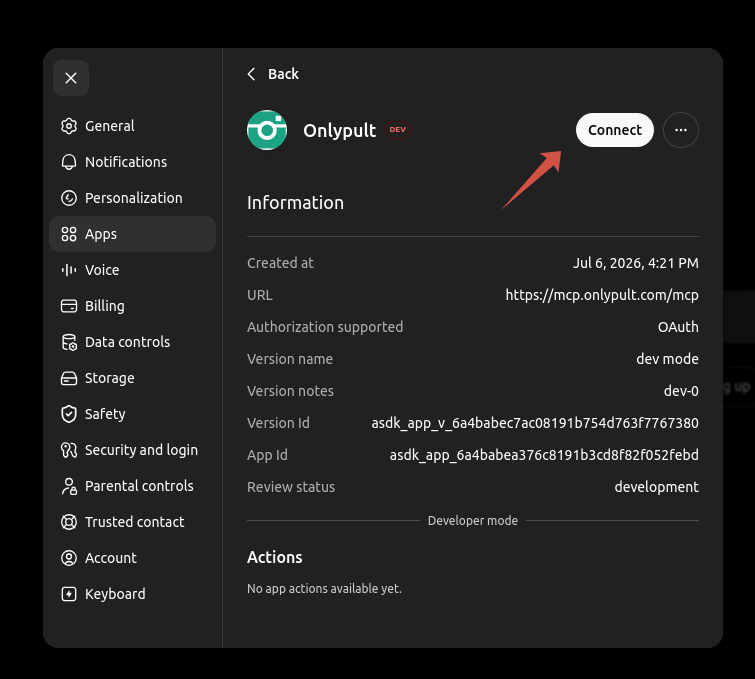
ChatGPT opens an authorization dialog. Click Sign in with Onlypult. You will be redirected to the Onlypult consent page — log in if needed and click Allow access.
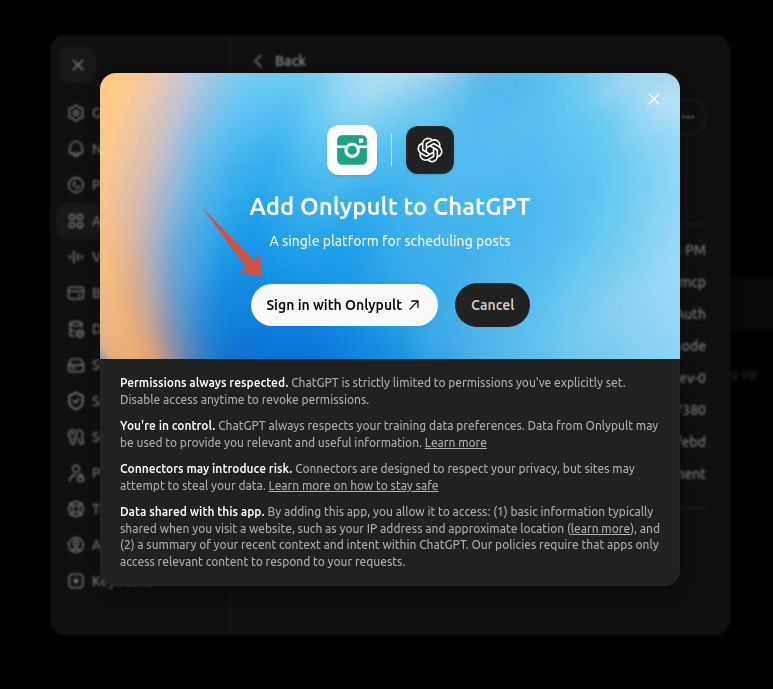
After approval, the app status changes to connected. You only need to authorize once per app.
Step 5 — Use Onlypult in chat
Start a new chat and mention the app explicitly with @. Type @Onlypult (or the name you chose), then your request.
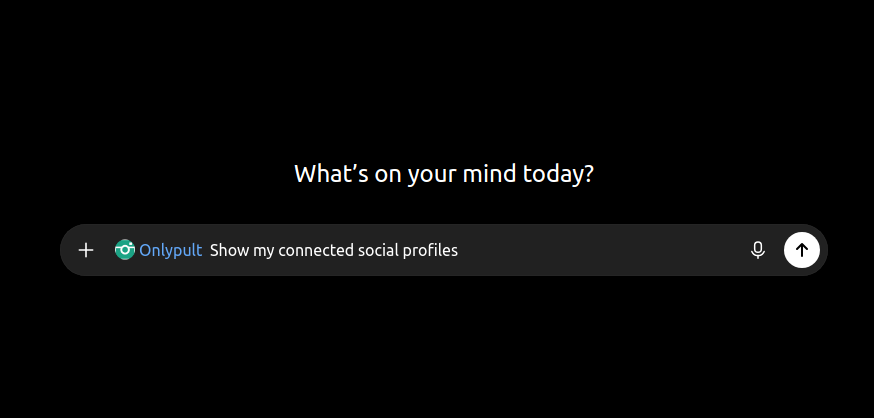
ChatGPT routes the request to the Onlypult MCP server. Example — list connected profiles:
@Onlypult Show my connected social profiles
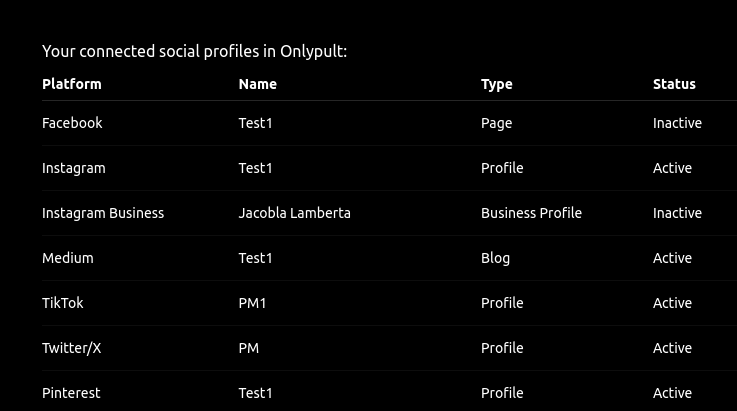
Other things you can ask:
@Onlypult Post "Hello world!" to Instagram now@Onlypult Schedule a LinkedIn post for tomorrow at 9am@Onlypult List my failed posts and retry them
See the full tool reference for everything the MCP server supports.
Important: Always include @Onlypult (or your app name) in the message. Without the mention, ChatGPT will not call the MCP tools.
Troubleshooting
I don't see App Preferences or Developer mode
These options roll out gradually. Try updating ChatGPT or use the Connectors path if you have ChatGPT Plus/Pro. You can also use Cursor or Claude.ai instead.
Authorization fails or loops
Make sure you are logged into the correct Onlypult account. Clear the app and recreate it, then authorize again. The consent page must show Allow access — if you see an error, check that your Onlypult session is valid.
ChatGPT doesn't call Onlypult tools
- Confirm the app shows as connected (not just created) in Apps → Drafts
- Include
@Onlypultat the start of your message - Start a fresh chat after connecting — existing chats may not pick up the new app
Need help with MCP tools?
See MCP Server documentation — tool list, media upload flow, and OAuth details.