The Planner is a tool for precise calendar planning of publications. Let’s say you have a weekly media plan for several months. Then, having set the time of weekly publications in the Planner, you can simply upload content, and the posts will automatically and in order occupy the created time slots.
How to create a publication schedule
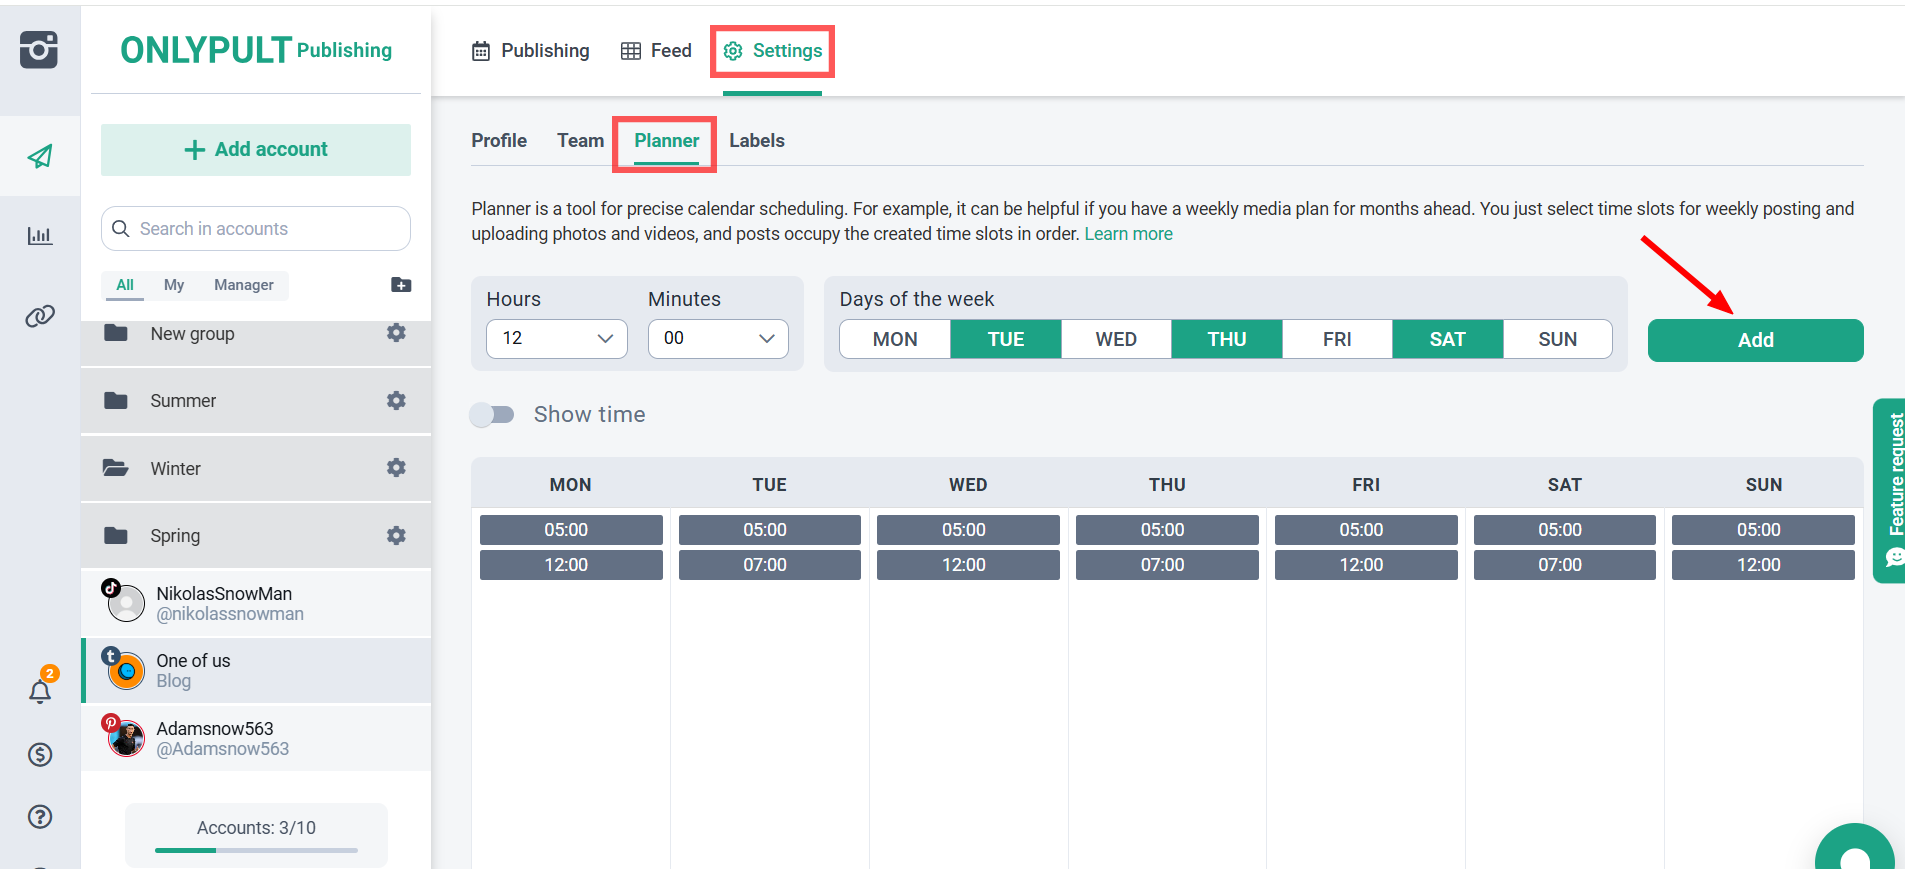
To access the Planner, go to the settings of the selected account, select the desired time and days of the week and click the “Add” button:
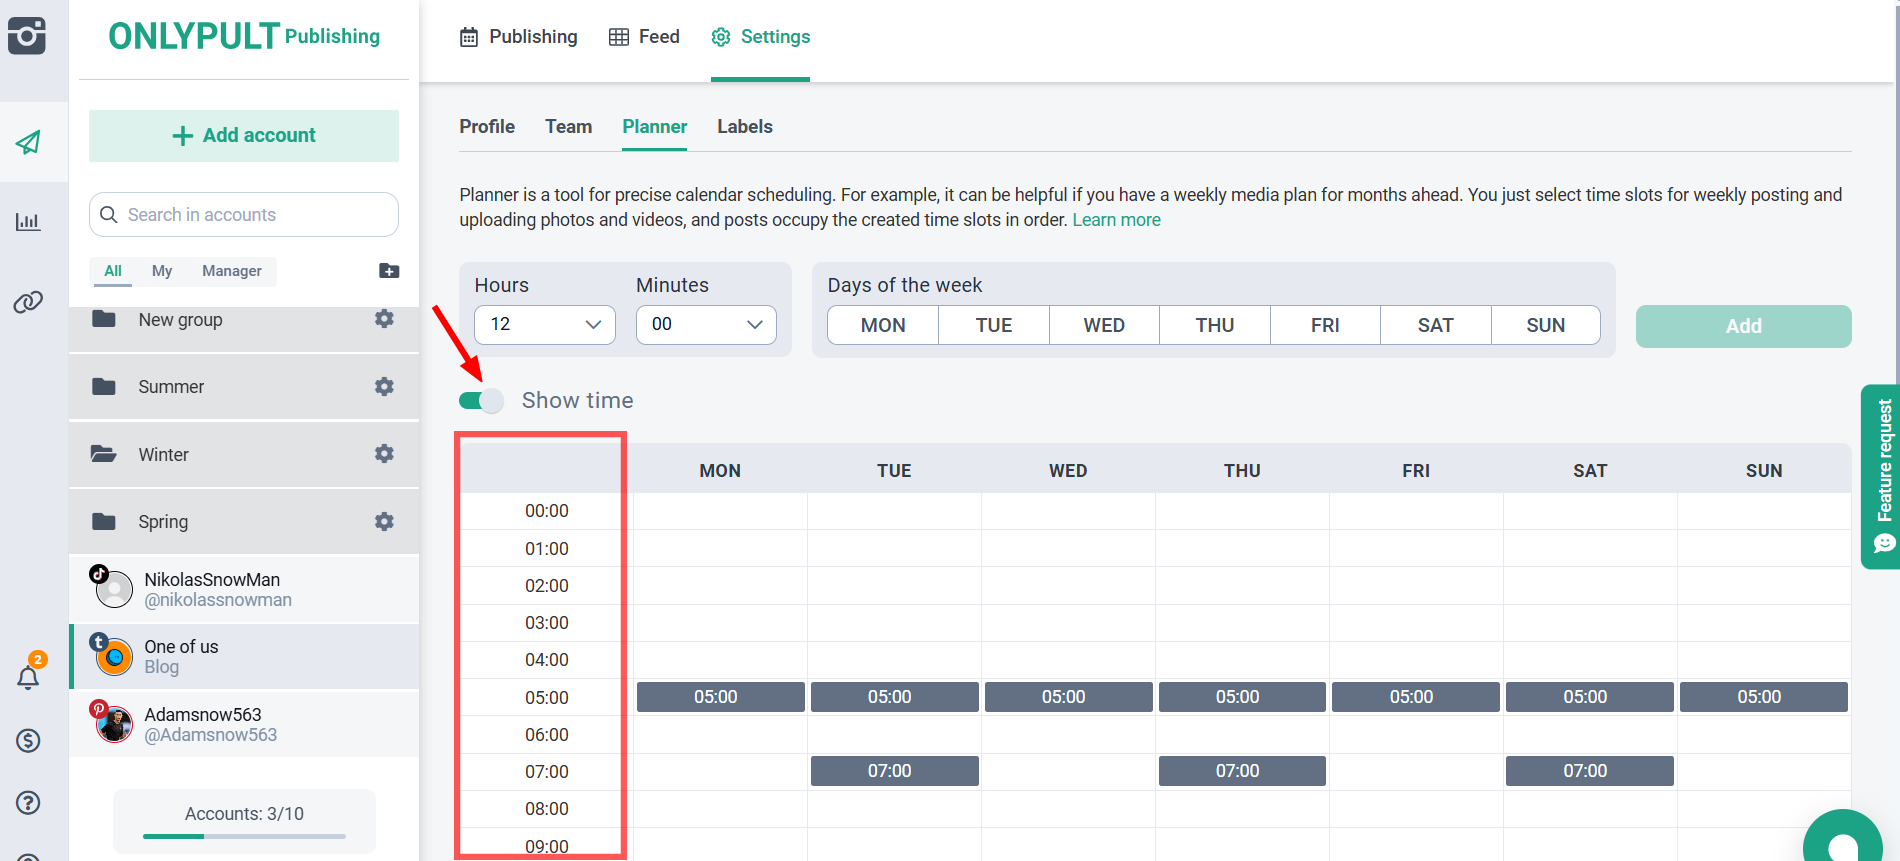
In some cases, it may be more convenient to change the way the schedule is displayed using the “Show time” switch:
You can delete cells one by one, or all at once by clicking on “Clear all slots”:
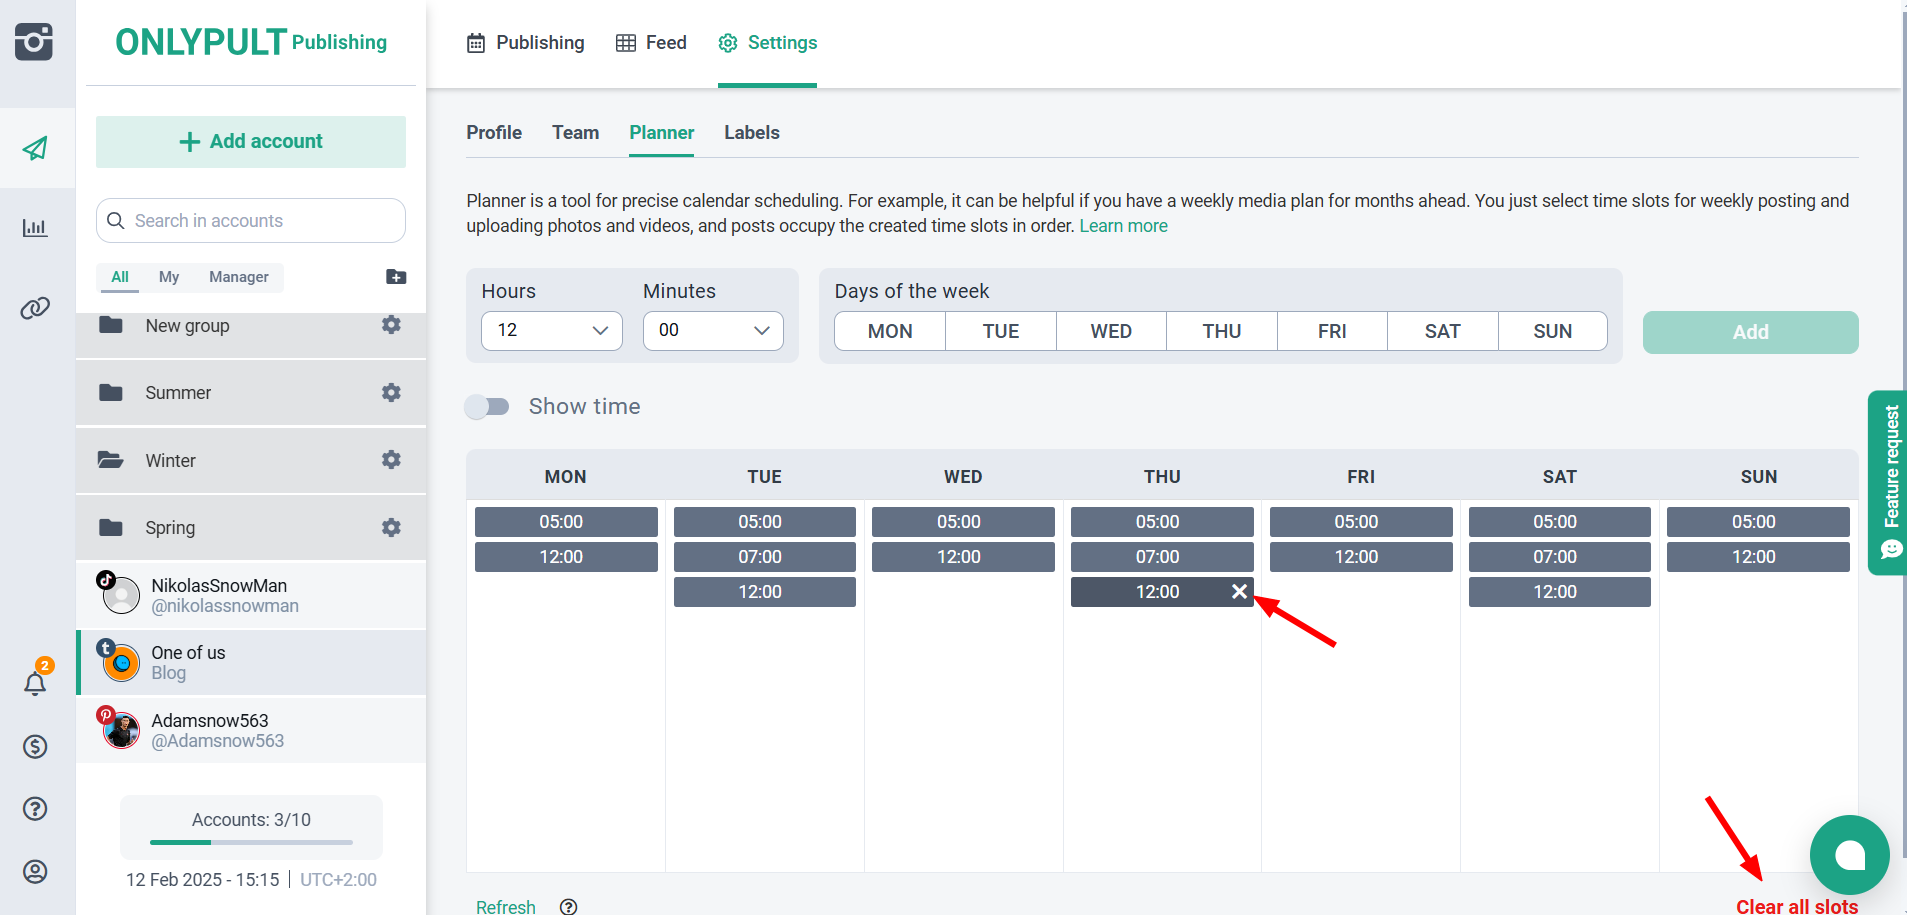
Important: If you delete a cell for which a post (or several posts) was scheduled, it will still be published at the previously scheduled time.
How to use the schedule when creating publications
Now, when creating posts, you can do fewer actions - do not set the date and time for each of them, but immediately select the desired cell from the Planner:
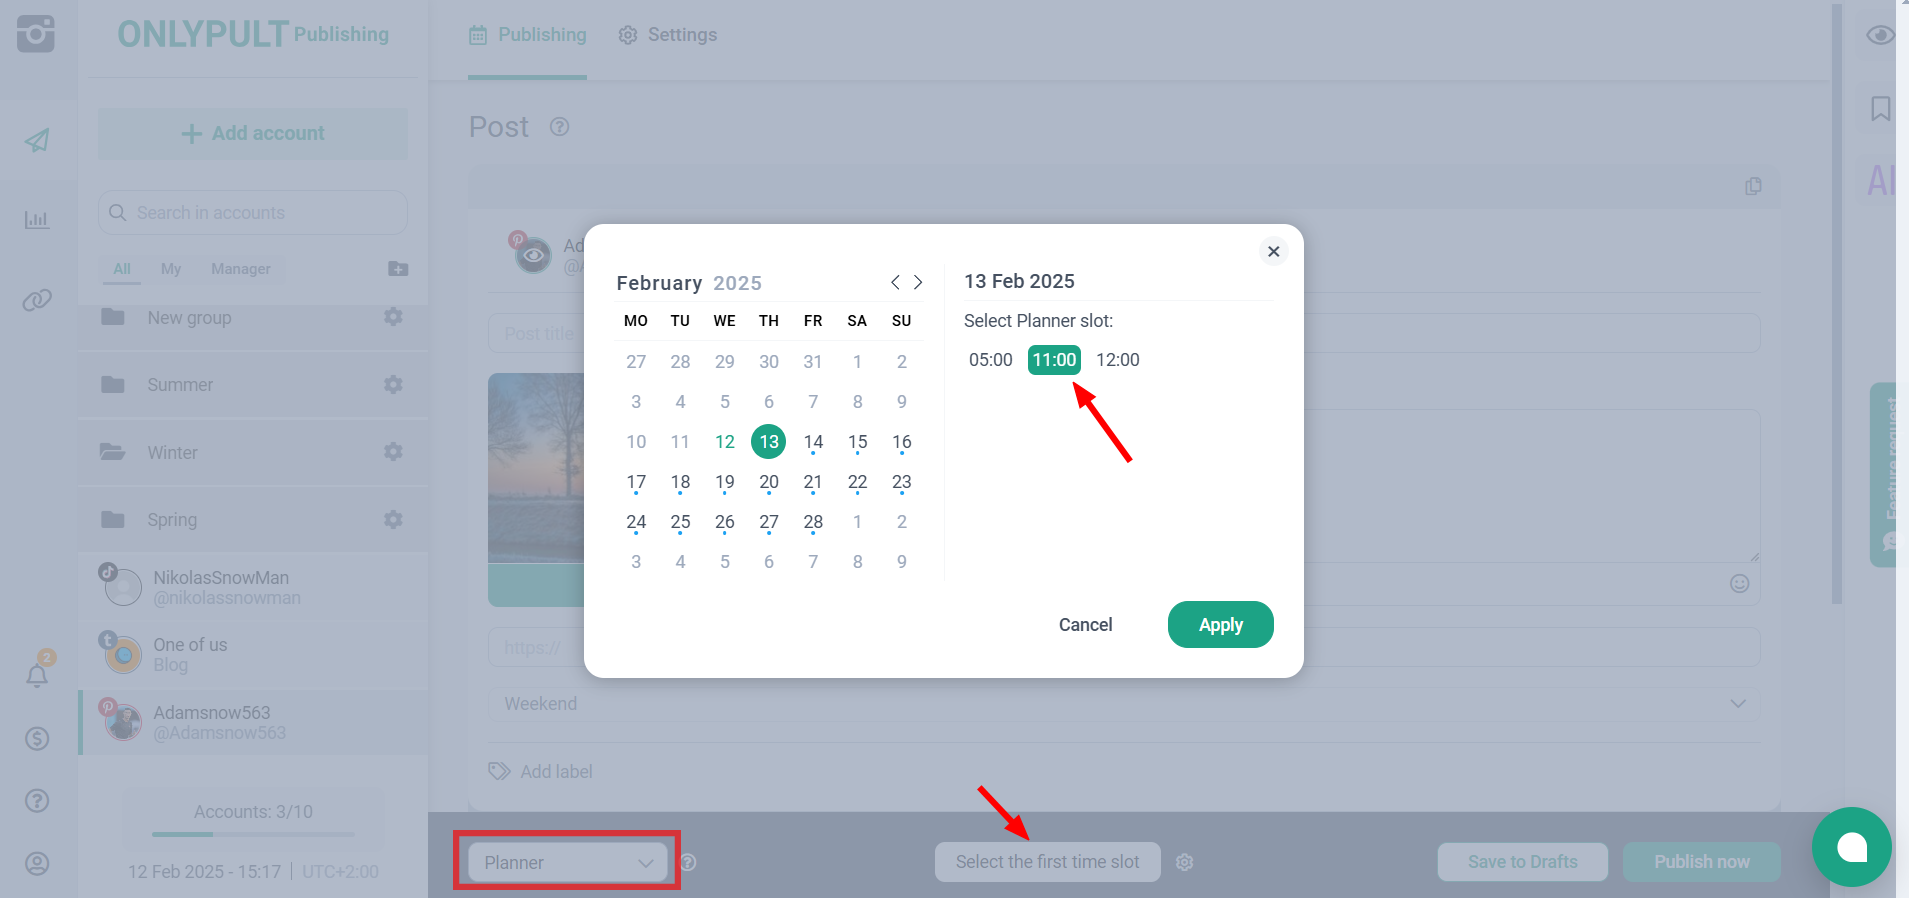
Moreover, for a series of posts, you can select the starting cell only for the first one, and then all other posts will automatically occupy the following cells in order.
Displaying posts scheduled with the Planner
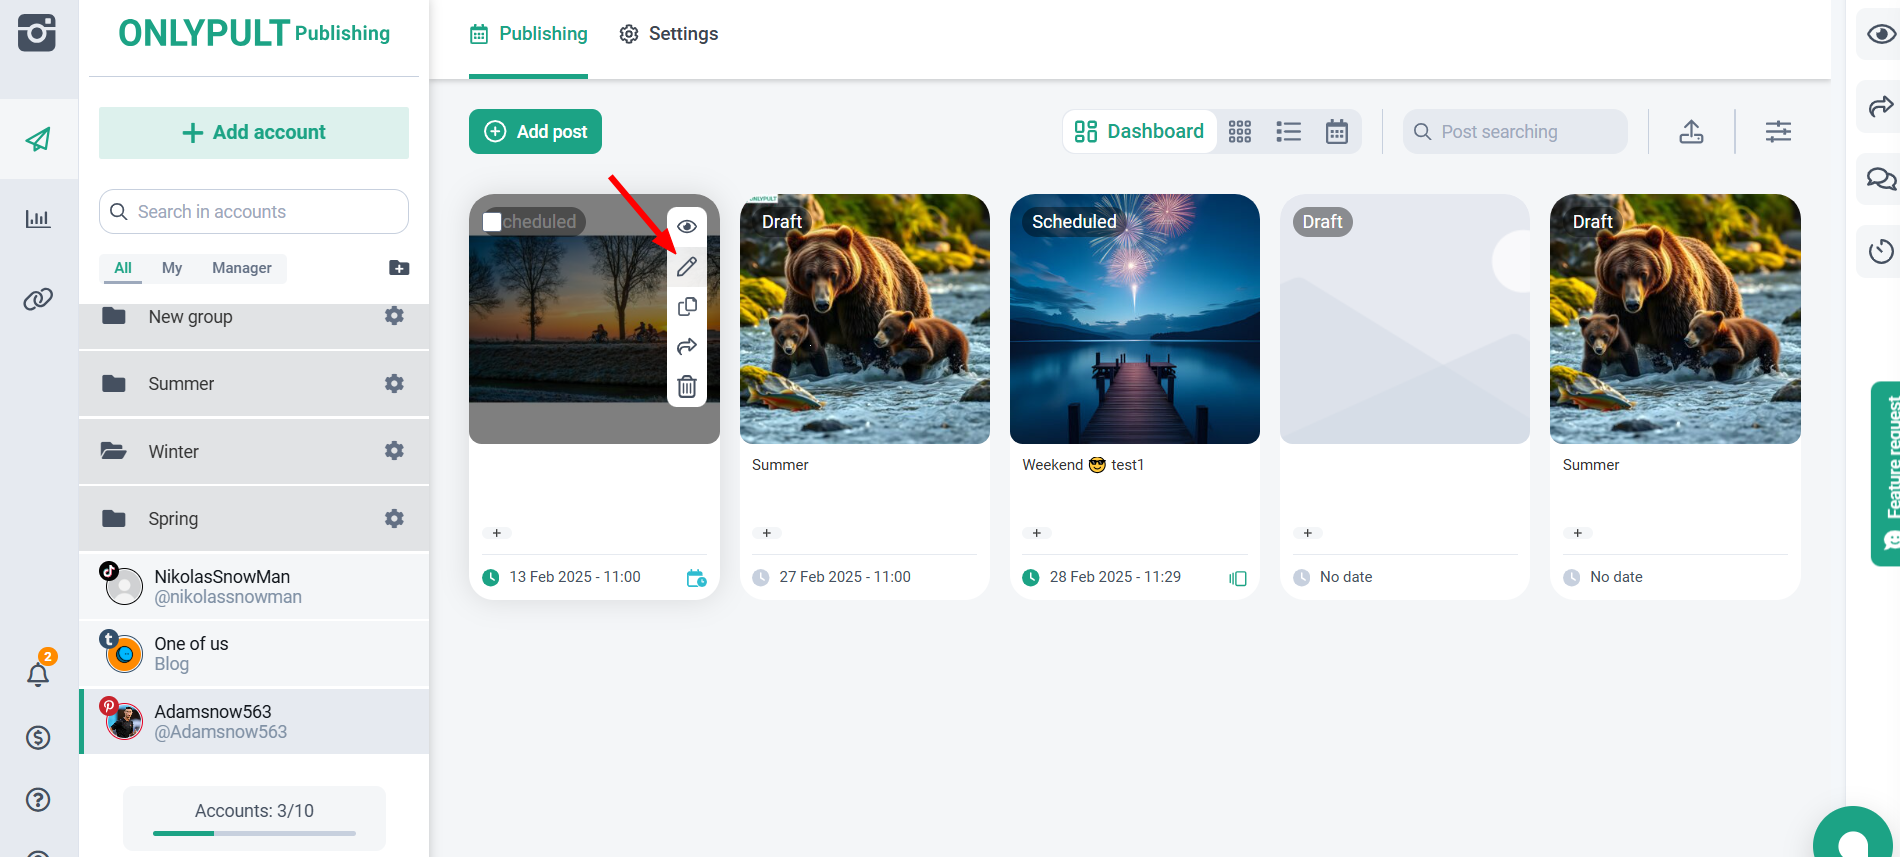
You can find all posts created with the Planner in the “Publication” tab. All Planner posts are marked with the corresponding icon:
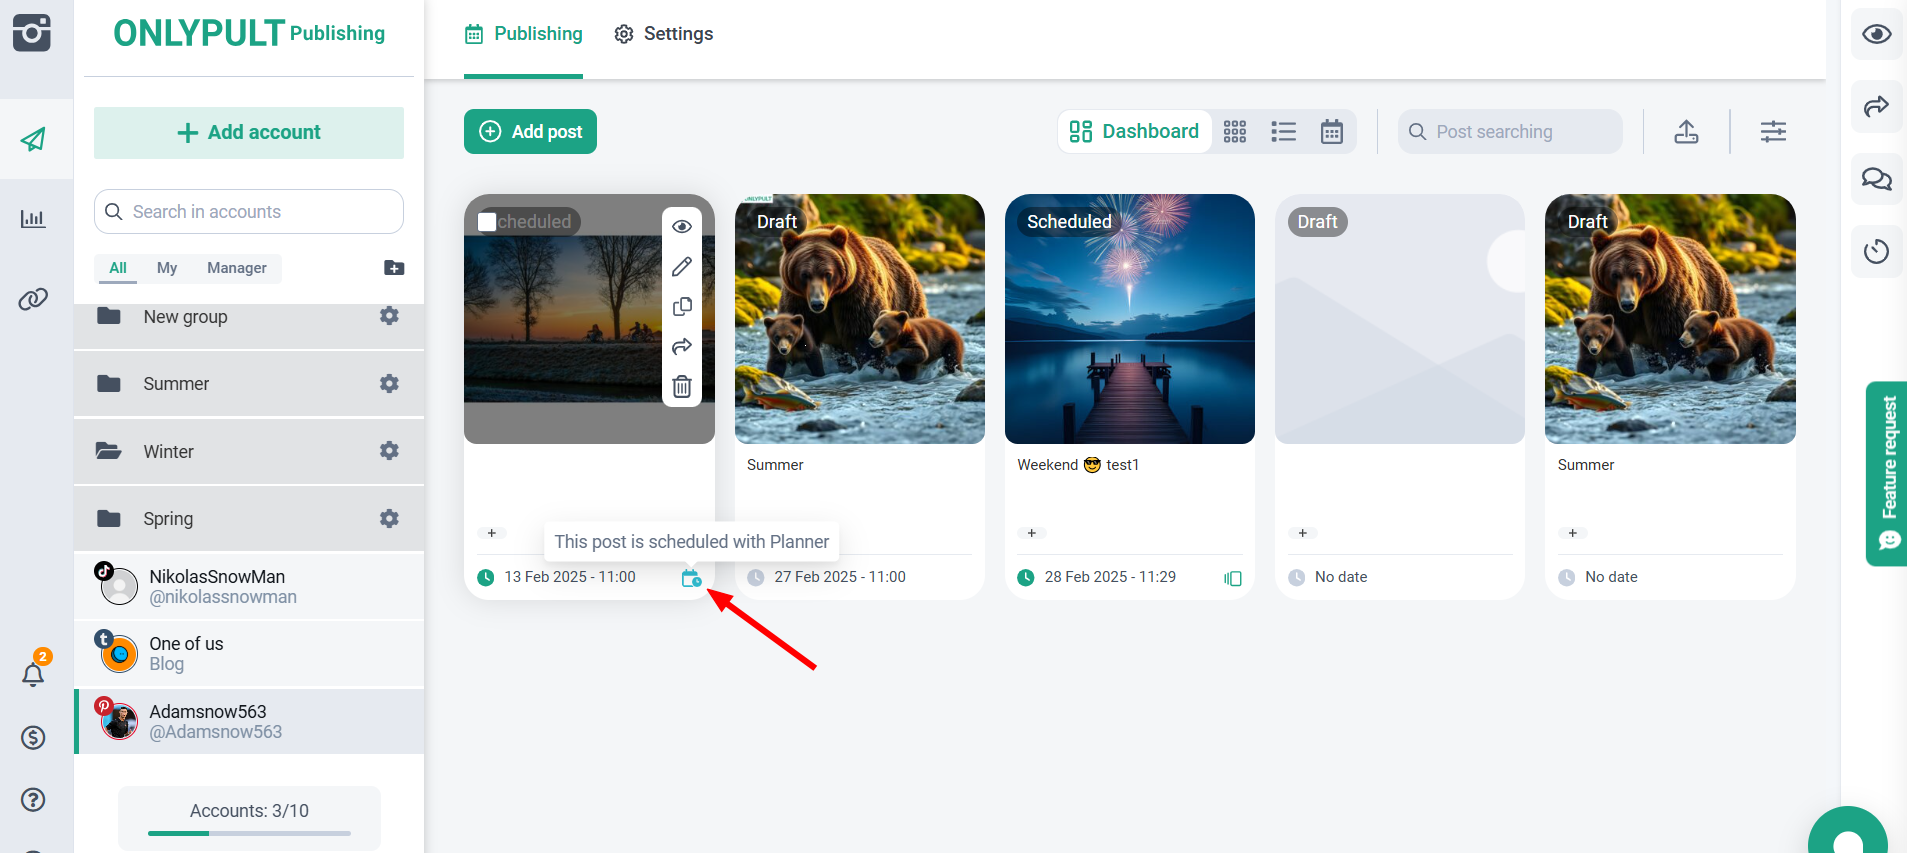
Editing posts created with the Planner
You can edit a post created with the Planner as a regular post. The only difference is that you can change the date and time only for a free time slot in the Planner. To edit a publication, click on the corresponding icon:
