
How to create a Facebook business page
Step 1. Click on the Facebook icon to move to the main page of the social network. Facebook has groups as well as pages. Groups are better suited to communities centered on different subjects, where the users themselves create content. Choose a group if that’s what you want. If you intend to create content yourself, whether for a company page or your personal page to promote yourself or your firm, choose a basic page.
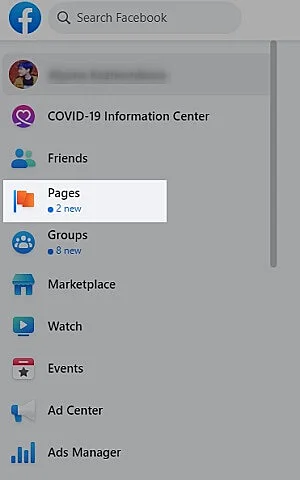
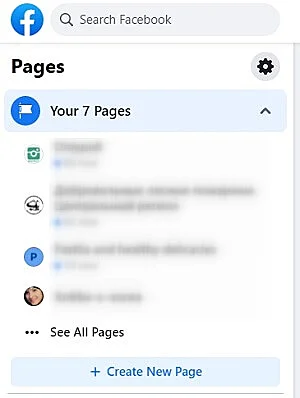
Step 2. Opening this section, you see the options to manage your existing pages and create a new one. In the Pages section, select “Create a Page.”
Step 3. Press “Create a Page.” Now come up with a name. It needs to be short, authentic, preferably search-optimized and contain keywords. If you are creating a regional community, the name of the city may also be appropriate.
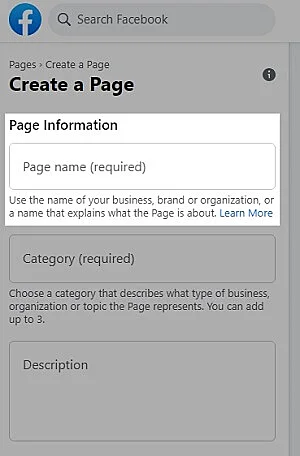
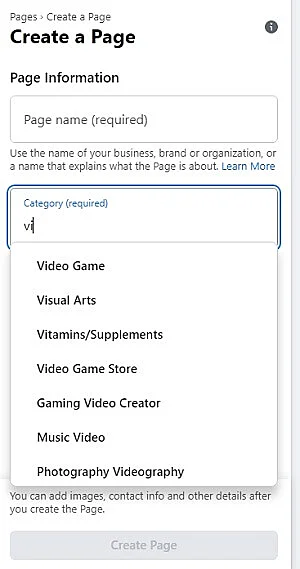
Step 4. Facebook wants you to choose a category from a dropdown menu. You add a description of a couple of sentences: what your company is about, what the page is for.
Step 5. Click “Create page.”
Step 6. Once Facebook has confirmed that the page has been created, you can either easily save it or go on formatting it. You can, for instance, add a profile photo.
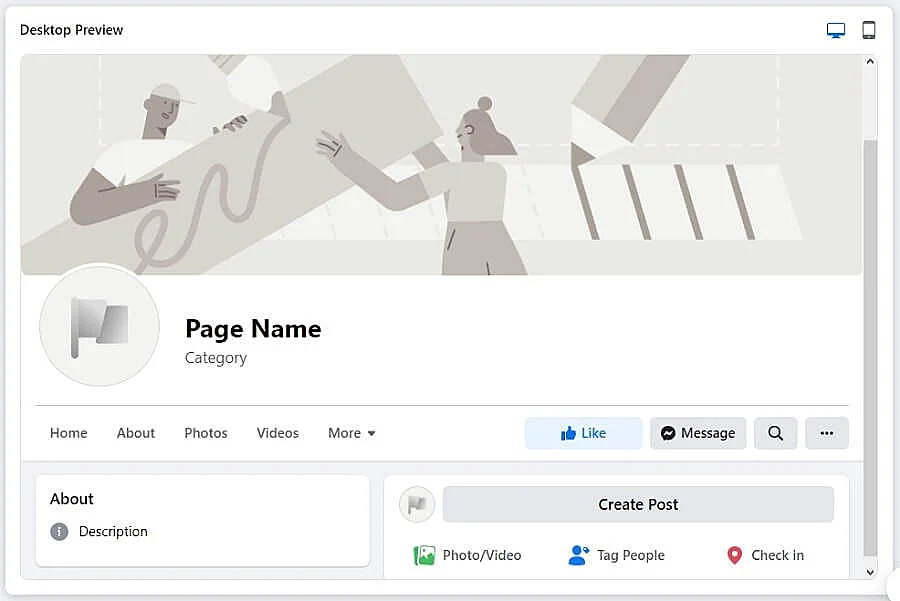
You can search online about the requirements for Facebook cover photos and avatars — the header size varies. Or only make a broad image in high resolution, 1900 pixels across, at least.
Step 7. The page has been created. Now you can add a button, a link to your website, if you have one, or to messages where people can get in touch with you.

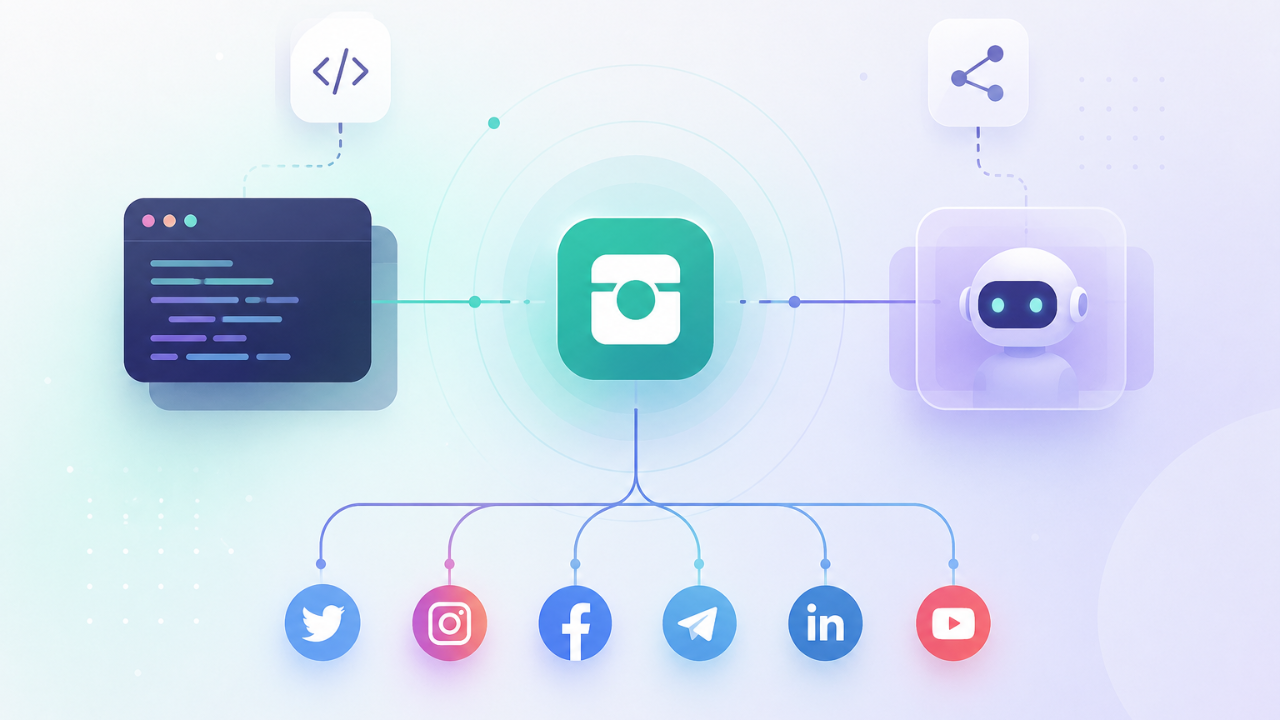
Onlypult posts to Facebook, Instagram, TikTok, VKontakte, and many other platforms. It has a user-friendly post editor and allows collaboration.
New Facebook page settings
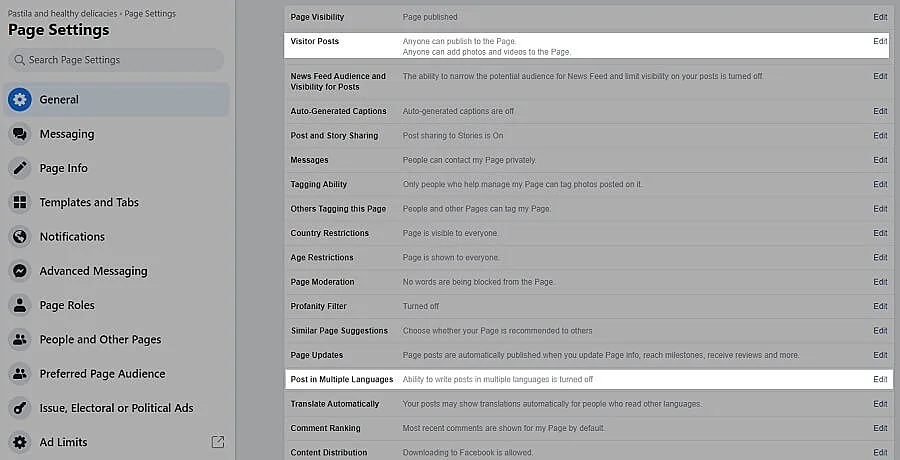
The default settings are acceptable for the most part. But there are a few places you can tweak.
Main settings
One important thing you can do is forbid other users to write something on your wall. Block their posts here. They will still be able to write comments but not post to your news feed. Better turn on the profanity filter, too. If you are going to post in different languages, there is an option for that here, off by default.
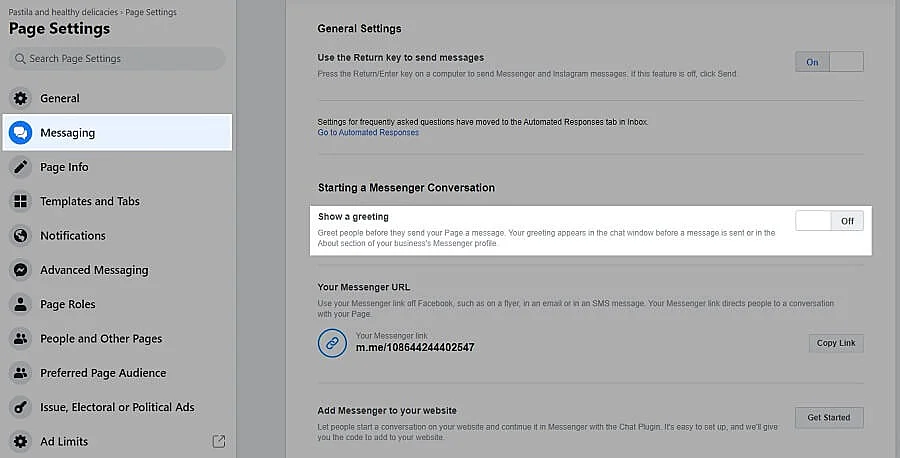
Messaging
You can turn on the autoreply and enter a text that people will see when messaging you.
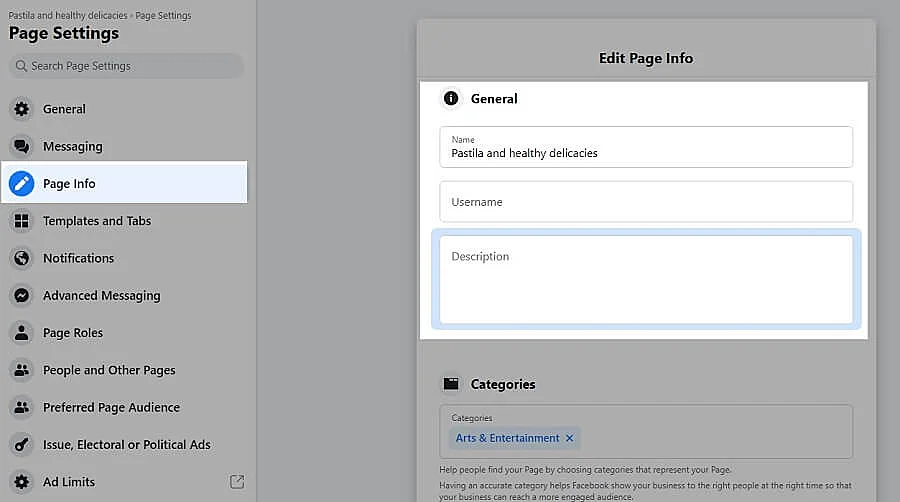
Page information
Here you need to enter the user name — the page URL. It is crucial to have the same nickname on all social networks and websites so that people can remember your hashtag and nick. Add contact information, if you need it: telephone number, e-mail, website, make sure to add an address if your business is regional. Add geolocation and make sure Facebook homes in on the right house. Add working hours if this applies.
Page sections
Next, you will need to enable/disable page sections. There are quite a few of them — choose the ones you need.
- Events – keep this if you intend to create any.
- Reviews – whether others can comment on yourself or your company. Disable if that’s undesirable.
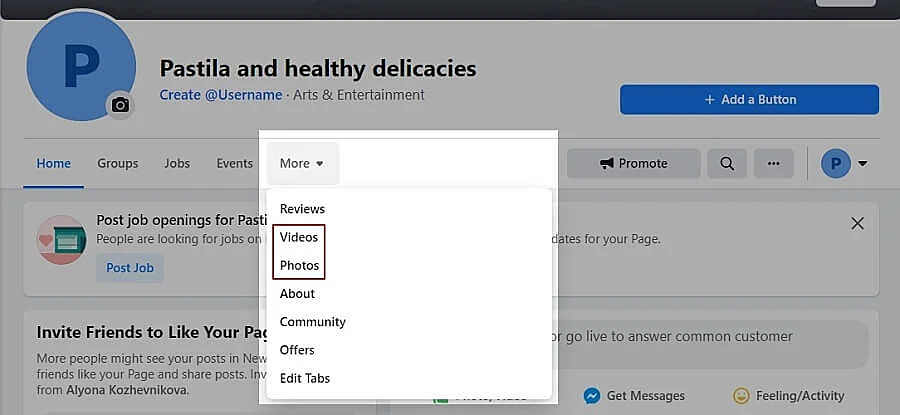
- Videos, Photos, About, and Groups – cannot be disabled.
- Shop – your products.
- Vacancies, Offers – special promotions.
- Services and Notes – doubled functions. You can put some information in these navigation tabs, but few people notice them. The majority looks only at the main news feed.
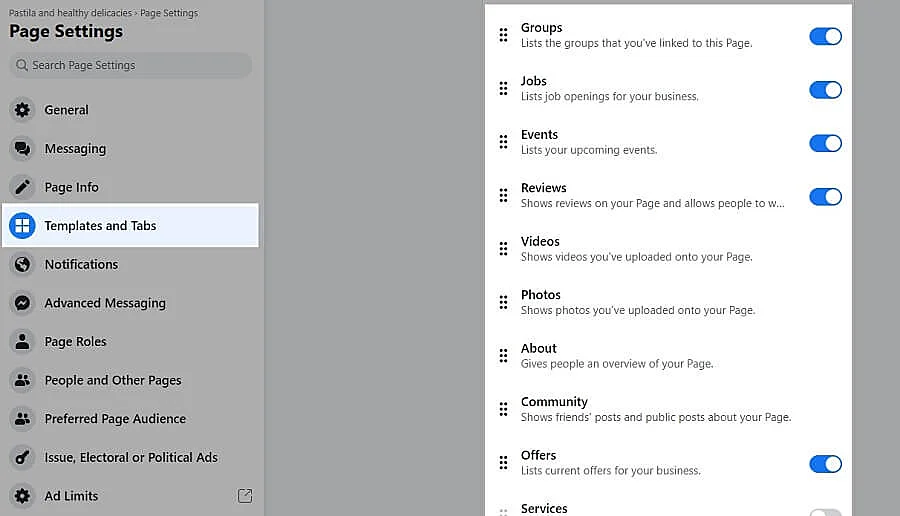
Note that you can drag and move these sections up and down. If you prefer your latest videos to be on top, pull it there. If you are not going to feature videos on your page or only rarely, you can drag this one to the hard bottom.
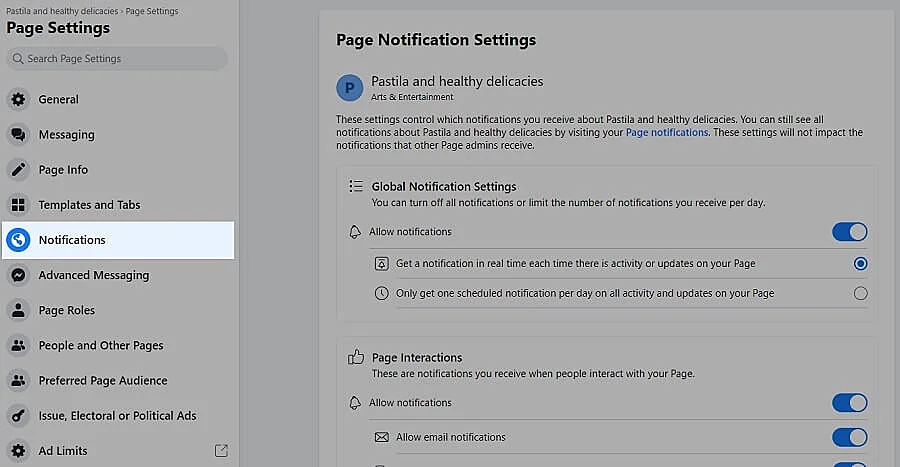
Notifications
Set up how you want to be notified – to your phone, by e-mail, through notifications in the social network itself – and when (you have been liked, got a subscriber, or a comment).
Social issue and political advertising
Social issues and political advertising functions are related to audience targeting. Facebook wants these ads to be safe. If you aren’t involved in those fields, ignore the section.

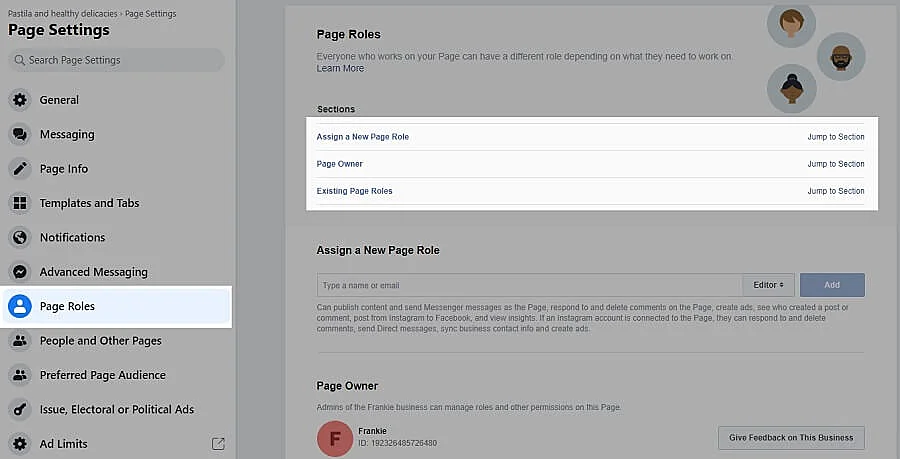
Team access
Set up access for several administrators or possibly an editor, etc. Enter the user name or e-mail connected to a Facebook account and assign a role:
- administrator: full access to settings and community management;
- editor: can only create content;
- moderator: only manages comments.
Access to analytics and ads cabinet: here, you will see the current managers. And you can add or delete people from the list.
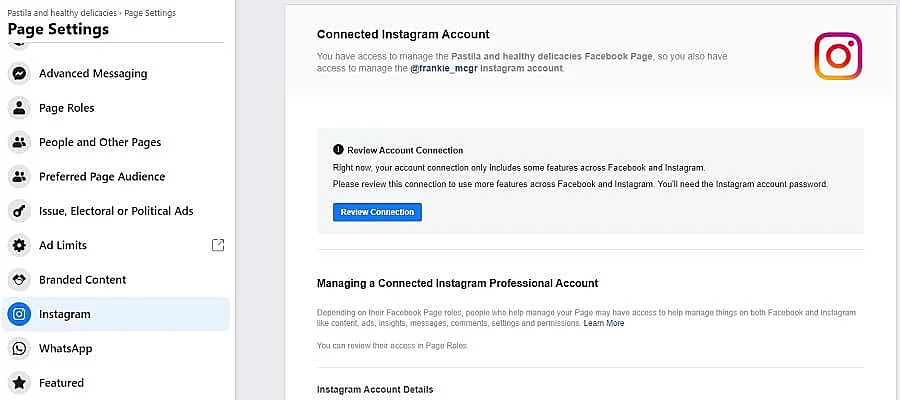
Plug in an Instagram account. On Instagram, there are standard user accounts and business accounts that can create advertisements and have access to analytics and statistics. You can switch to a business account from Facebook. If you have only a simple Instagram account, you can link it here, and you will be able to make ads, tune targeting and examine data. Responses from the Facebook technical support will also show up in this section.
Photos and videos
It is the place to plunk down picture albums: from corporate events, special-interest, group photos, and so forth. Click to create a new album, come up with a name, description and upload the snapshots to keep them in good order in a heap of media content — the same for videos.
Another possibility is playlists. They are helpful if you want to bring order to an assortment of videos with different subjects. When uploading a picture or clip, you can add geolocation; YouTube links are also allowed and will be converted to the embedded playback format.
With Onlypult, save time you spend on SMM tasks — posting to all social media, analytics, multiple links, micro landing pages, web monitoring. All in one place.