
Success is not luck but the result of good planning and hard work. Planning helps reach the target gradually, step by step. It concerns almost every kind of work but this article tells about making a content plan.
Content planning on social media seems unnecessary because it’s easier to do everything on the spot here, like figuring out lots of ideas and scheduling posts. But can you try to schedule the next 10 posts right now? And what about 20? In our previous article, we told you how to write posts properly. But how to plan content properly?
What for is a content plan?
One of the main purposes of a content plan is to set precise goals, which you want to reach with your efforts. Content planning will help you:
- Augment brand recognition
- Drive traffic to your website
- Interest potential customer
- Make sale
- Increase views/purchases/reach
But being aware of your goals is just the tip of the iceberg. The most important thing is to make a content plan, which is efficient exactly for your account. How to do it? Here are the three simple steps.
1. Determine your account type
The very content depends on it. What do you prefer: to teach people something new, sell them goods/services or tell them about yourself? What can you do best of all?
Having chosen the content topic, go to the next step – divide content into two groups: one – to entertain/inform and the other – to sell.
2. Design the structure of your content
However one may wish, your content plan cannot include only posts that sell. Analyze your existing content and determine which posts got more reach, and classify them into categories. Also, spot the least popular posts and decide if such the content is worth publishing in the future.
Tell stories – if your profile contains advertising posts only, it becomes a boring online shop which is of interest to nobody.
Create your posting scheme according to categories. For example, if you publish 2 posts to educate or inform (information on a product or a service, FAQ), you can publish 1 to sell and 2 to entertain.
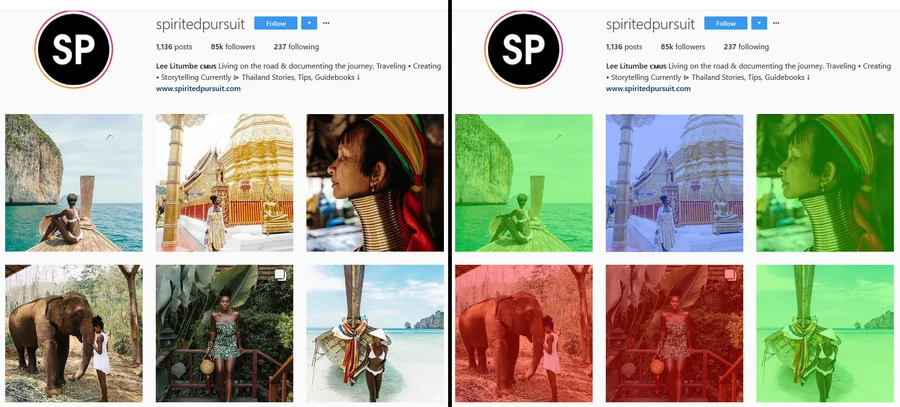
The account of a travel blogger Lee Litumbe (@spiritedpursuit) is almost a perfect example: 3 of the latest 6 posts tell about her (marked green), 1 – informs (marked blue) and 2 – unobtrusively advertise/sell (marked red):
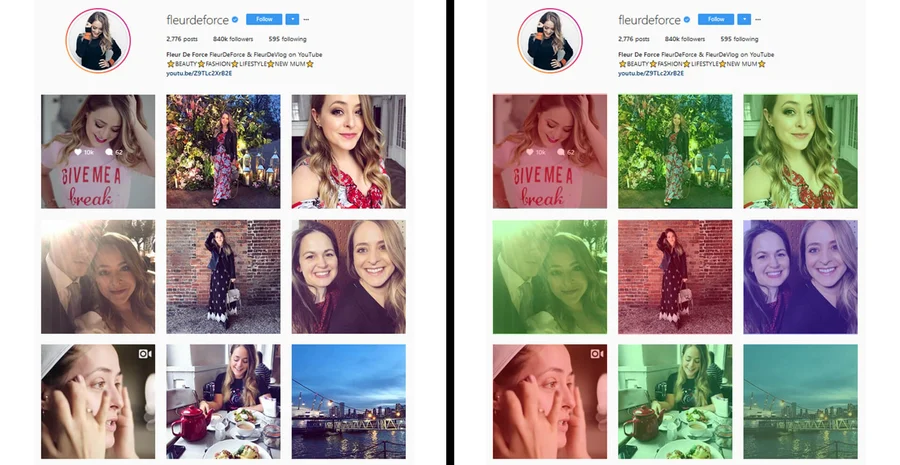
And here is a popular beauty blogger Fleur (@fleurdeforce). She created her own scheme of efficient posting: 6 of the latest 9 posts tell about her, (marked green), 1 – educates (marked blue) and 3 contain pure advertising (marked red):
Don’t forget about the fact that Instagram is, first of all, a communication platform. Encourage feedback from your followers. Choose interesting and understandable images and videos. Try not to write long posts: 500-600 characters is enough for scrolling through on a mobile. Try not to deviate from the subject of your account and respect your followers’ preferences based on their likes, comments and recent activity on your account in general.
3. Create a content calendar
So, now when you have determined your account type and the most popular posts among your audience, it’s time for planning.
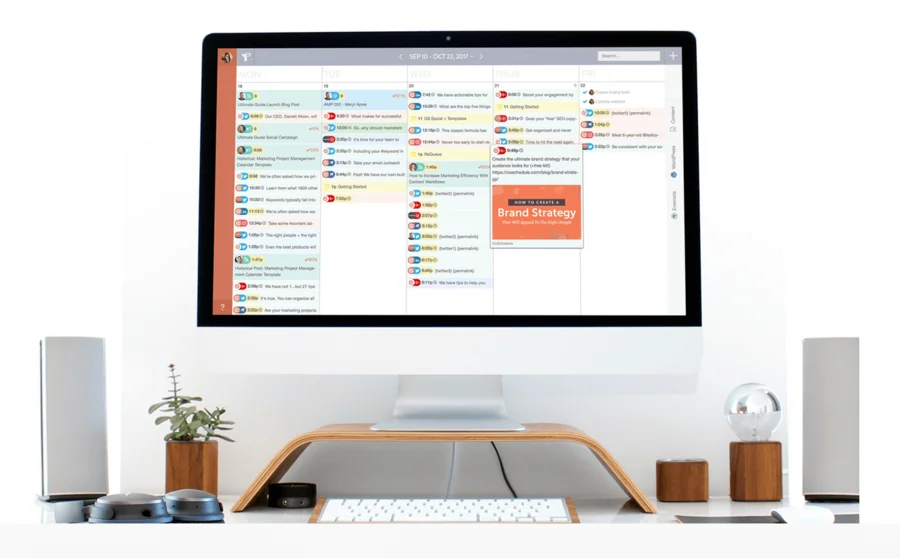
Open Google Sheets or create a Microsoft Excel document and make a proper table containing days of week and slots for topics of posts. If you don’t like traditional tools, you can use content planning programs, for example, CoSchedule and the like:
Analyze your progress every week and compare different content plans to learn which one has been the best in the current month. You will most likely spend approximately several weeks on it, but you will understand your audience’s tastes and create the most popular content.
A 5-minute weekly content plan
After determining your account and content type making a content plan will turn from boring routine into a weekly challenge of searching for the most efficient posting scheme.
After a couple of weeks, content planning for a week (or even weeks!) ahead will take not more than 5 minutes, and your head will not be preoccupied with filling the account with content.
Upon setting your weekly plan to manage your sсheduled posts, you may need our Planner. Set the time for posting on different days of the week and then just upload your images/videos and posts will be automatically put in slots created according to the schedule. It’s the life of your dreams, isn’t it?