Video Tutorial:
With Onlypult, you can schedule and post Reels directly to all your Creator and Business Instagram accounts. However, Onlypult does not generate Reels, so you’ll need to create them beforehand and then upload them to Onlypult.
How to Schedule Instagram Reels:
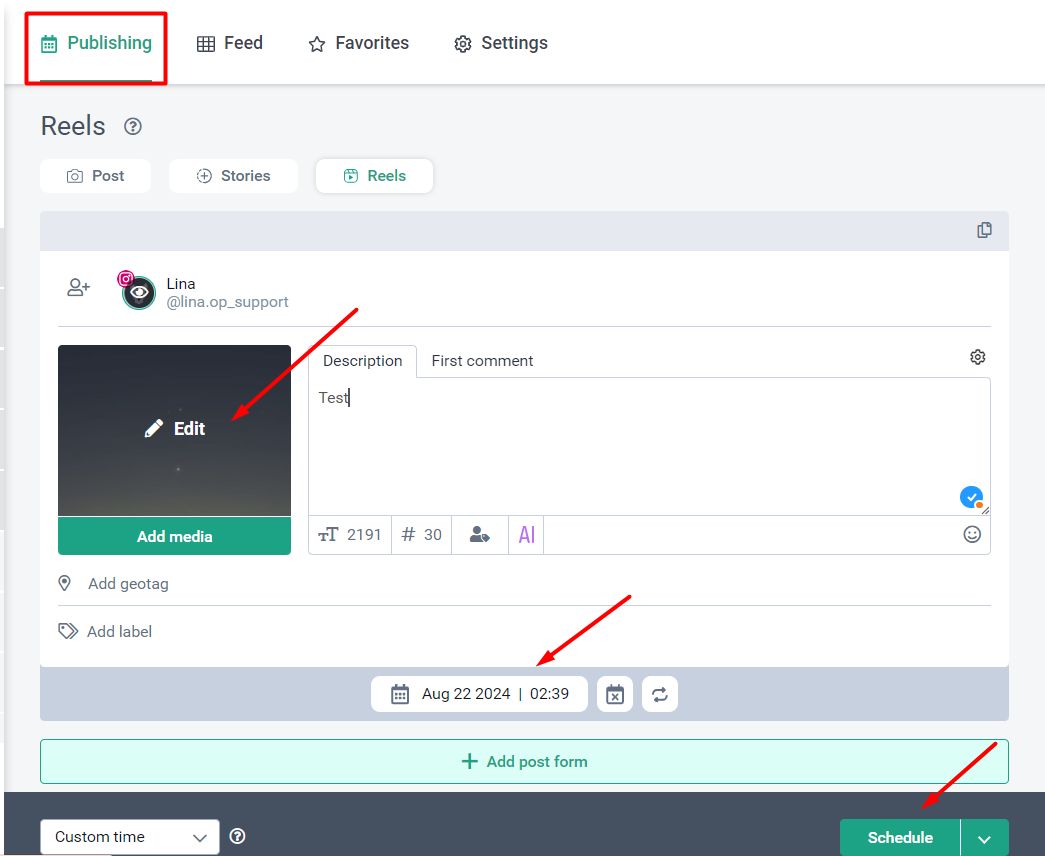
1.Go to the Publishing Page on Onlypult:
- Select Instagram from the list of accounts on the left and choose Reel.

2.Upload Your Reel:
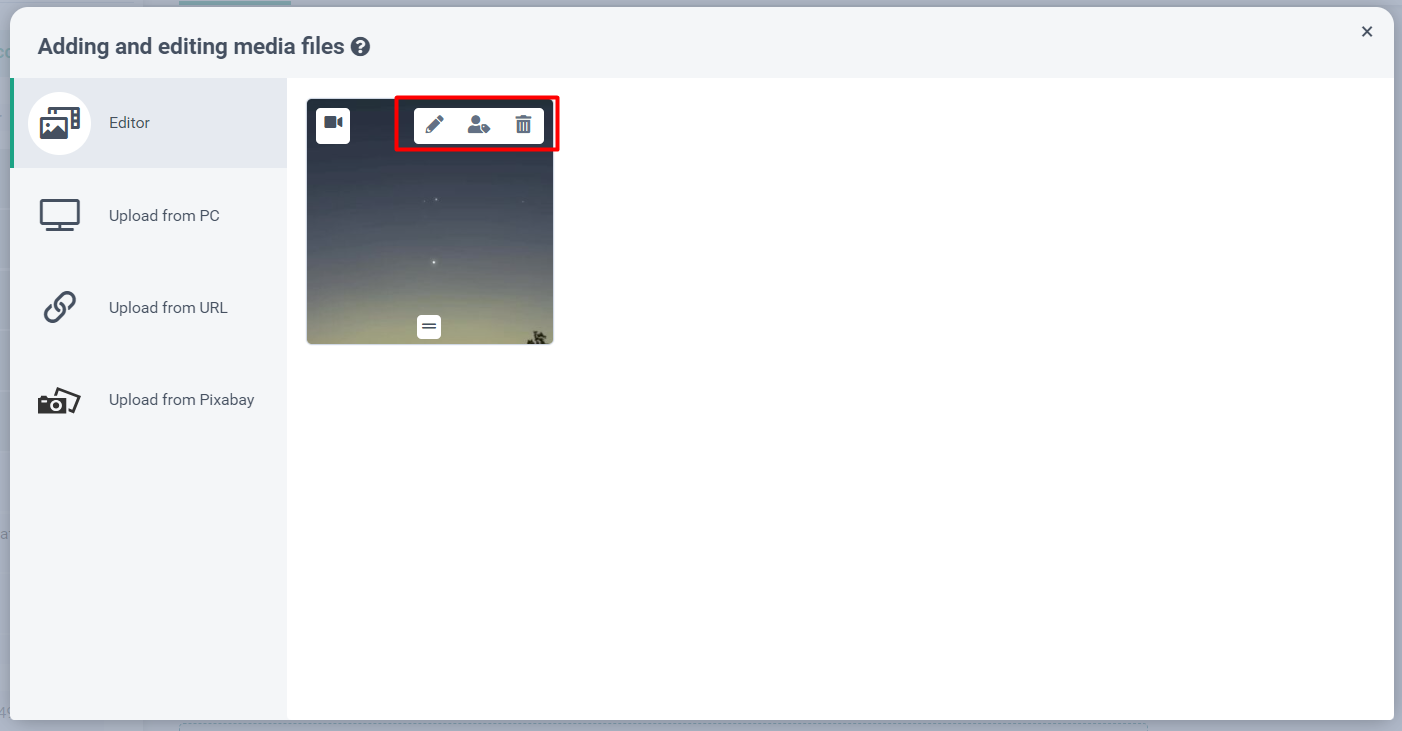
- Tap on “Click or Drag and Drop media” to upload your Reel and continue creating your post.
3.Note: By default, the Reel will appear in both the Reel and Feed tabs. You can choose to share it only in the Reel tab. Keep in mind that only Reels with durations between 5 and 90 seconds and an aspect ratio of 9:16 will appear in the Reels tab. Otherwise, they will only be posted in the Feed.
4.Add Music/Audio:
- Ensure the Reel you upload already has the music/audio added within Onlypult due to API limitations. You can also post a Reel without any sound.

5.Customize Your Reel:
- Tag people or products.
- Change the audio description/title.
- Add a location, first comment, watermark, etc.
- Cross-post it to other social accounts.

6.Schedule Your Post:
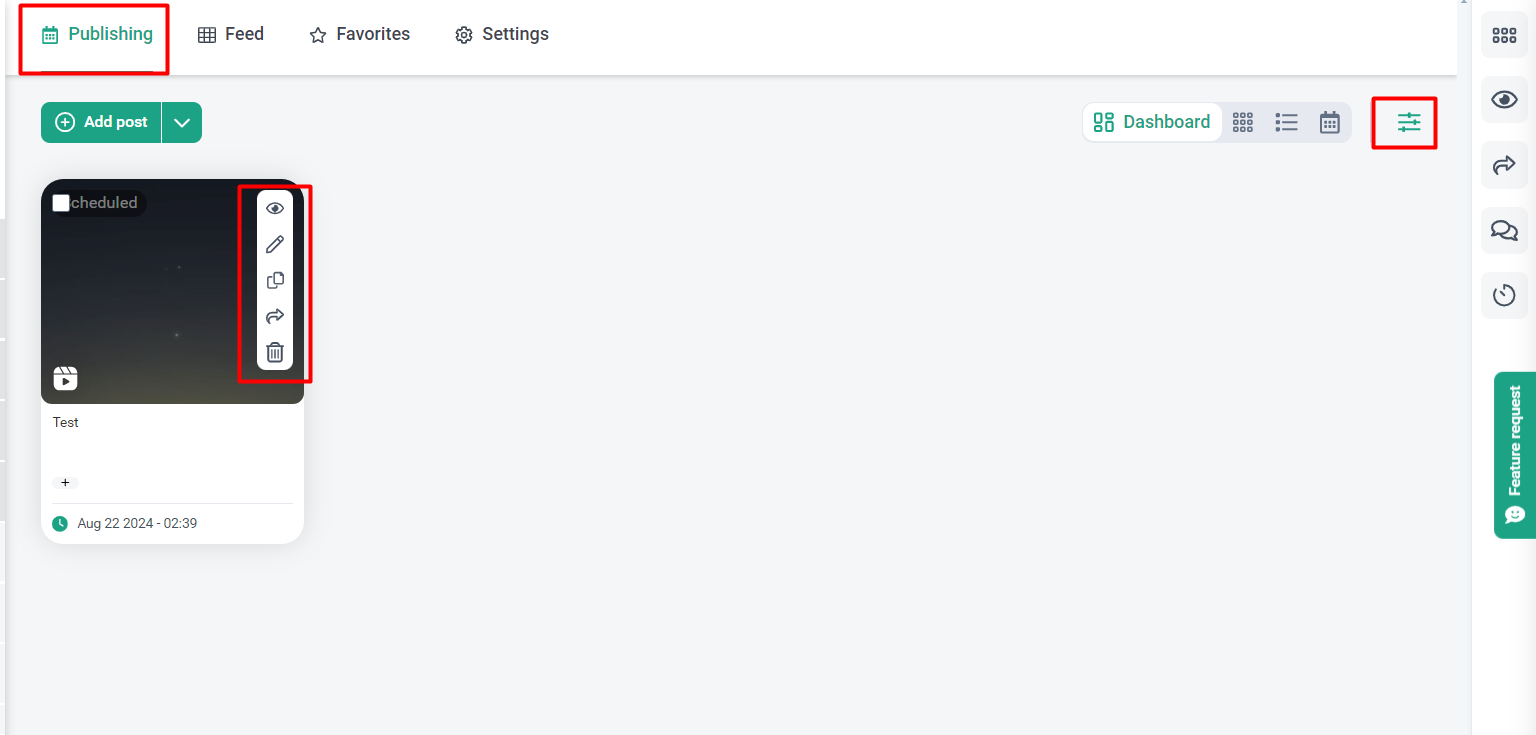
- Once scheduled, you will be able to see the Reel in the Publishing tab.
- Filter only the publishing settings you want on the right.

Tips and Additional Features:
- Batch Scheduling: You can schedule multiple Instagram Reels at once with a CSV file.
Limitations and Warnings:
- Thumbnail Selection: You can select a custom thumbnail for Instagram Reels through Onlypult.
- Video Requirements: Reels can be between 3 seconds and 15 minutes long, with a maximum width of 1920 pixels and a size no larger than 100MB. The required aspect ratio is between 0.01:1 and 10:1, but 9:16 is recommended to avoid cropping or blank spaces.

