

Managing social media for several brands is not just a matter of scheduling more posts. It means keeping different audiences, assets, deadlines, and reviewers straight.
A restaurant might use Instagram for food photography, TikTok and YouTube for behind-the-scenes videos, and Facebook for local updates. A B2B client might focus on LinkedIn. When all those profiles sit in one long list, even a quick account check takes attention away from the work.
Projects in Onlypult let you organize that work around a client or brand, rather than around individual social networks. Each project brings its profiles, posts, calendar, Planner, labels, and team into one workspace.
Give every client a dedicated workspace
A useful starting rule is simple: one client, one project. If you work in-house, use one project per brand or business unit that has its own content plan and approval process.
For example, a freelance social media manager could keep a restaurant, an online store, and a fitness studio in separate projects. An agency could give each account team access to the clients they handle, without mixing their day-to-day workflows.
Use the project switcher to move between workspaces and open their settings. You keep the whole client in view, not just the Instagram profile you happened to open last.
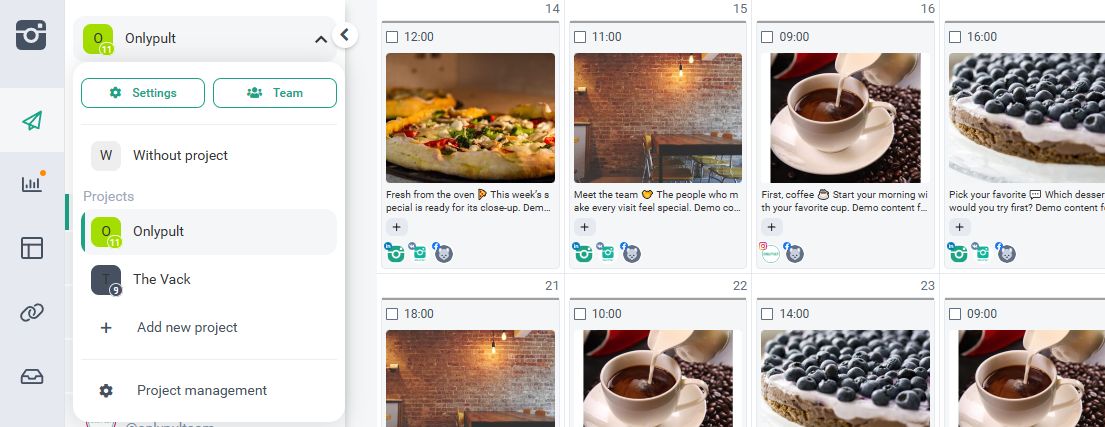
Switch between projects and access their settings or team from the same menu.
The screenshots show the Onlypult workspace in English. Restaurant examples and demonstration posts are illustrative, not a client case study.
Set up the project and add its profiles
Open the project switcher, choose Add new project, and give the workspace a recognizable name and color. Then bring the client’s social profiles into it.
If profiles are already connected to your Onlypult account, you can move them into the project instead of reconnecting them. The Accounts tab in the project settings lets you review which profiles belong to the workspace.
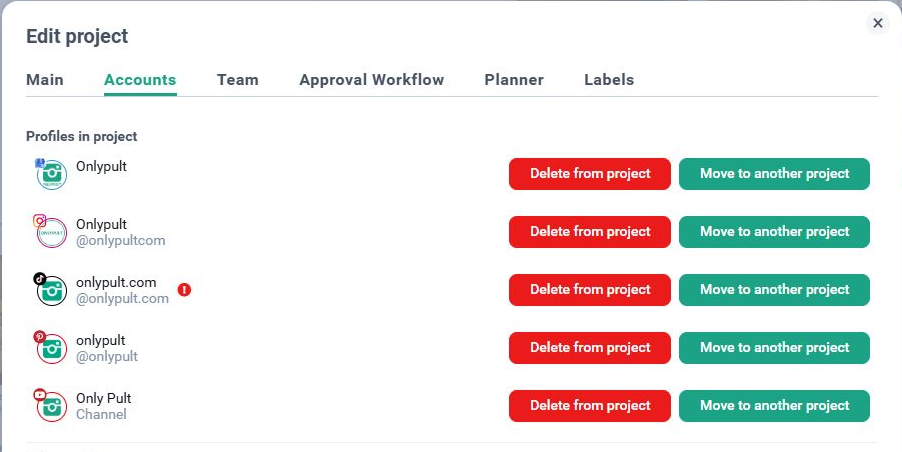
Keep a brand’s profiles together, including Instagram, TikTok, Pinterest, and YouTube.
There are two important boundaries:
- A profile can belong to only one project at a time. Decide which client or brand should own its day-to-day workflow.
- Only the profile owner can move it between projects. Before a move, review the destination project’s team access and approval settings.
Profiles that have not been assigned remain under Without project.
See the whole content plan, then narrow your view
Open the Project dashboard to work with posts across the project’s profiles. Choose the view that fits the task:
- Dashboard for browsing content cards and checking creative assets.
- List for reviewing posts in sequence.
- Calendar for understanding how content is distributed over time.
Filter by social network, status, date, post type, or label when you need a more focused view. For example, check one client’s Instagram content without leaving their project, then return to the full plan for a campaign review.
This is useful at handoff time, too. A teammate can start with the client’s workspace instead of reconstructing the plan from several separate profile feeds.
Reuse the idea, but adapt the post to each channel
A shared workspace does not mean every network should receive identical content.
Suppose the restaurant is launching a seasonal menu. The campaign could include an Instagram photo post, a short kitchen video for TikTok, a more detailed YouTube video, and a Facebook announcement with practical details for local customers.
Cross-posting in Onlypult helps you prepare versions for multiple profiles within the same project. Select the relevant profiles, start with the shared content, and adjust each version where needed. You do not have to rebuild the campaign from an empty editor for every account.
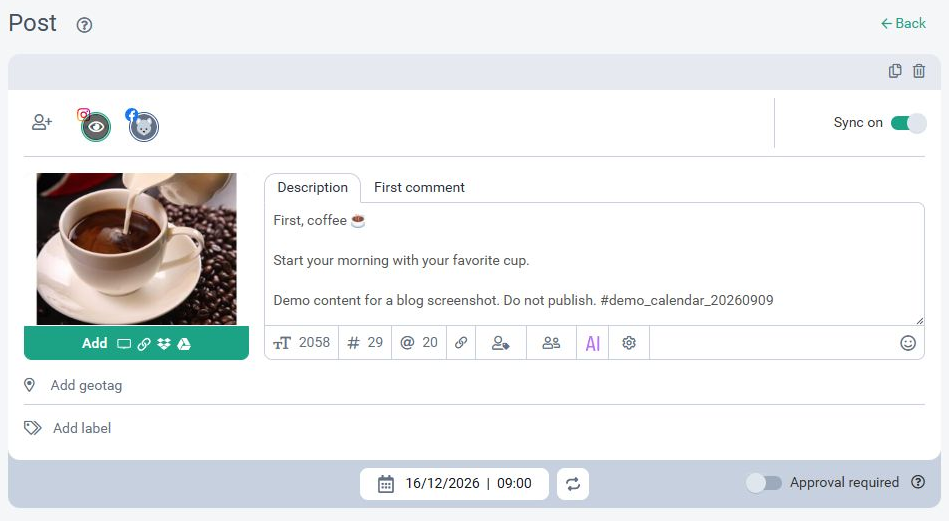
The post editor brings selected profiles together. Review each channel’s version before scheduling it.
Treat the shared draft as a starting point, not a finished asset for every platform. Check the opening line, call to action, media, and available publishing settings for each destination. An Instagram caption is not automatically the right YouTube description, and a still image is not a substitute for a TikTok video.
Cross-posting stays within the selected project. Keeping client profiles in separate workspaces also keeps the available destinations focused on that client.
Plan the campaign with Calendar, Planner, and labels
These tools answer three different questions: When does it happen? What repeats? Which campaign does it belong to?
Calendar: see the timing across channels
The project calendar brings content from its profiles into one view. Switch between day, week, and month to check a launch in detail or review the broader publishing rhythm.
For the restaurant campaign, you might put a teaser ahead of the menu reveal, follow it with a behind-the-scenes video, and leave room for a customer question or team introduction. The calendar makes gaps and crowded days easier to spot.
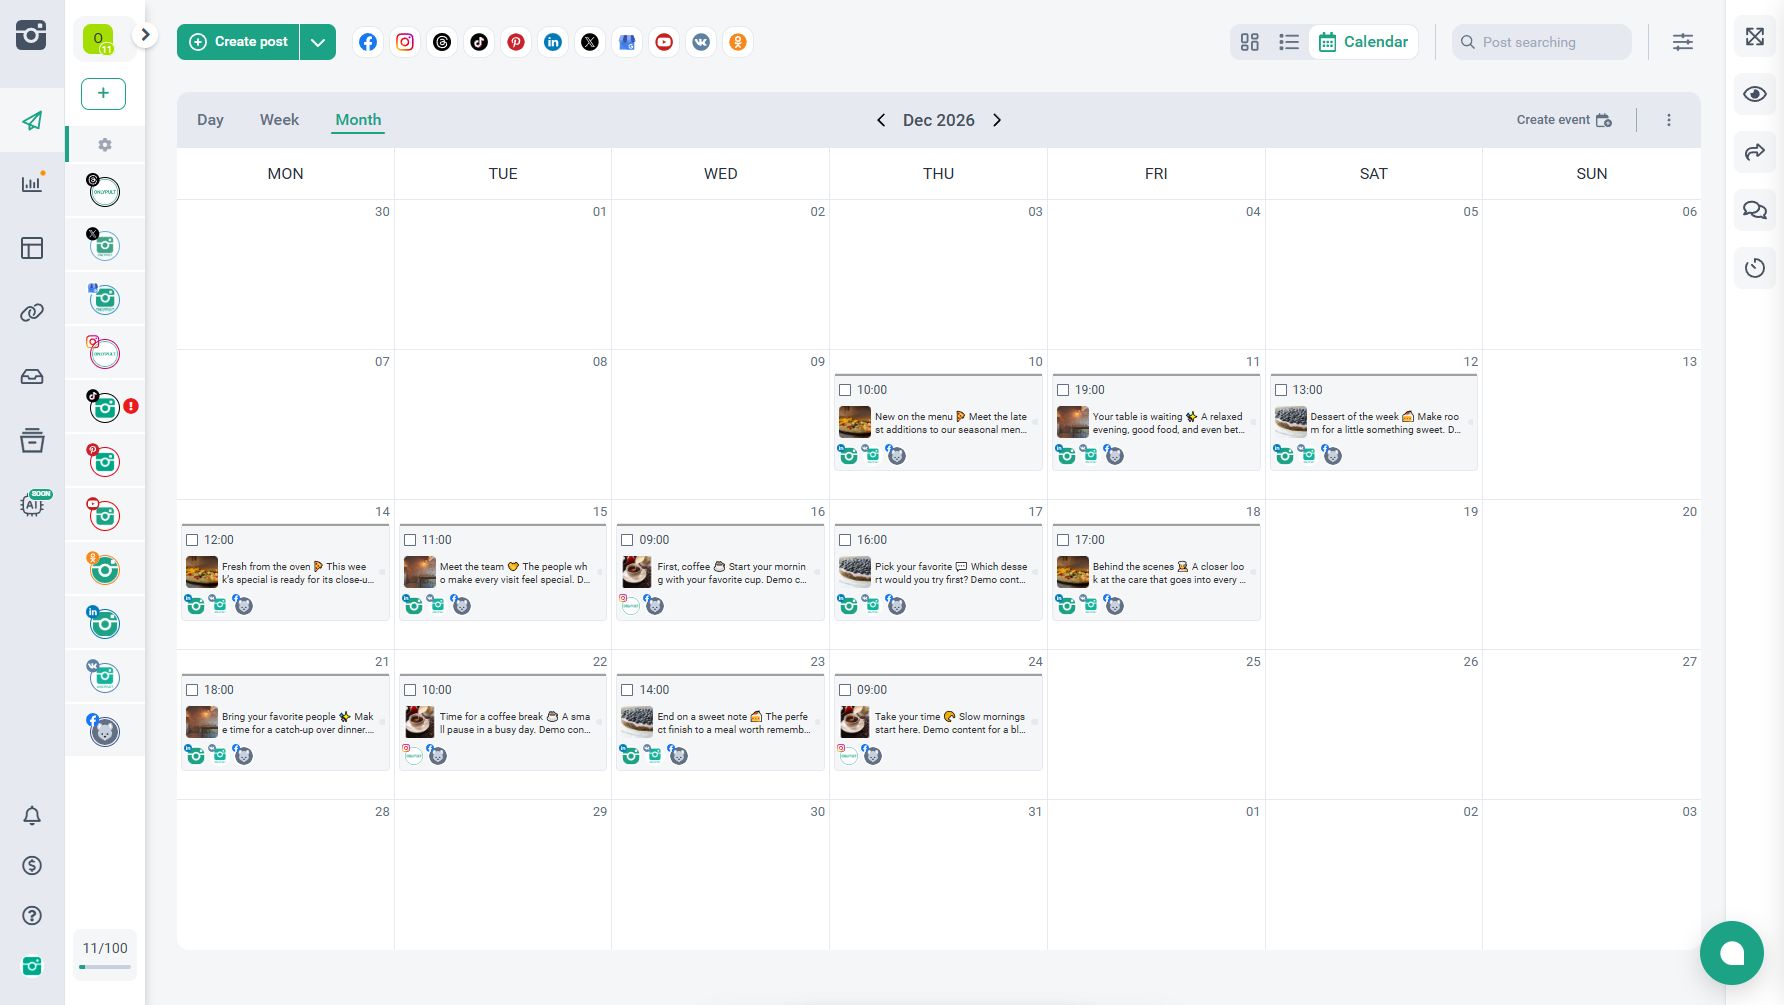
Month view with demonstration drafts assigned to future dates across several social networks. These test posts are not scheduled to publish.
You can also add calendar events for work that is not itself a social post: a photo shoot, a campaign launch, or a client review deadline. Calendar export is available through an ICS file or link when you need the plan in another calendar tool.
Planner: set recurring publishing slots
Use Planner when a client has an established cadence, such as a weekly product feature or a regular team update. Set the time slots once, then use them when preparing posts.
A project can have multiple planners with their own names and colors. This helps distinguish recurring schedules without rebuilding them for every post.
Labels: organize campaigns and content themes
Project labels give the team a shared way to categorize posts. Start with a small, useful set, such as Menu launch, Behind the scenes, Community, and Offers.
Then filter by a label to review a campaign or check the balance of content themes. Agree on the names with the team first: three labels that mean almost the same thing make filtering harder, not easier.
Keep client feedback inside the approval workflow
A client workspace is also a practical boundary for collaboration. Give people the role they need: managers work on content, approvers review it, and guests can view it without editing posts.
Access is managed at the project level. When you add another profile to a project, its team gains access through that project, so review membership before expanding the workspace.
In Approval Workflow, choose whether posts need approval and how it should work. Optional approval allows approval by one team member; Approval required requires all approvers to approve before posting. The settings also let you allow approval of drafts and restrict editing after approval; the editing restriction does not apply to drafts.
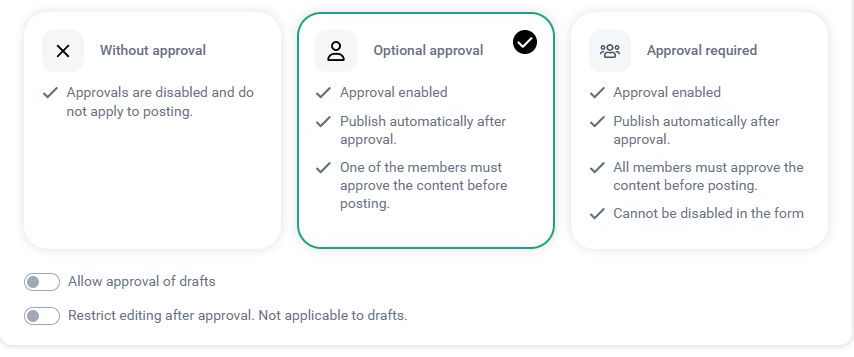
Set the approval rules for the project, including draft review and editing restrictions.
For a small client account, one designated reviewer may be enough. For a brand with several stakeholders, agree on who must sign off and when. Choosing the workflow in advance is more useful than discovering a missing approval on launch day.
A few things to know before reorganizing your account
Can the same profile appear in two projects?
No. Each profile belongs to one project at a time. Use the project structure to reflect responsibility for the profile, rather than creating a new project for every campaign. Labels are better suited to campaign grouping inside one client’s workspace.
What happens when a profile moves to another project?
Its posts move with it. Check team access and approval rules in the destination workspace before continuing work there.
Does deleting a project delete its profiles and posts?
No. The profiles move to Without project, and their posts are retained. Still, review the project and its team setup before making structural changes.
Start with one client
You do not need to reorganize every account at once. Choose one client or brand, bring its profiles into a project, and invite the people who work on it. Agree on a few labels and an approval process, then review the next month in Calendar.
That gives the team one clear place to answer a practical question: what are we publishing for this client, and what needs to happen next?